| Hole: 2 |
|
| Tees |
|
Yardage |
Par |
H/C |
| Blue |
|
365
|
4
|
3
|
|
| White |
|
350
|
4
|
3
|
|
| Gold |
|
326
|
4
|
3
|
|
| Red |
|
317
|
4
|
3
|
|
|
| Scorecard |
|
|
|
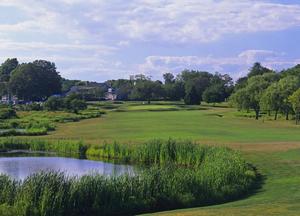
| Description: |
| Not an exceptionally long par four, which puts a premium on tee shot placement. From the middle of the fairway a mid to short iron approach to a demanding green. This green is the most dramatic of all the greens as it is sloped aggressively from back to front. Be advised down hill putts will be very fast. |
|
| How to Play It: |
| Club selection off the tee may vary depending on accuracy, 3 metal or utility club may be your best choice to guarantee a second shot from the middle of fairway. Fairway narrows and slopes more aggressively as it approaches green. Stay below the hole at all costs.
|
|