| Hole: 16 |
|
| Tees |
|
Yardage |
Par |
H/C |
| Blue |
|
217
|
3
|
14
|
|
| White |
|
196
|
3
|
14
|
|
| Gold |
|
154
|
3
|
14
|
|
| Red |
|
151
|
3
|
14
|
|
|
| Scorecard |
|
|
|
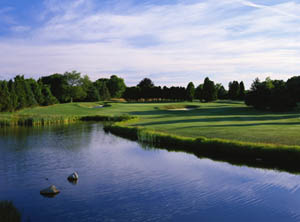
| Description: |
| A long, demanding par three with looming water hazard between the tee and green that must be navigated. With distances stretching from 130 yards to 220 yards, tee placement has much to do with the challenge. The green is slightly elevated and has large bunkers right and left. A valley rides through the middle of the green and is sloped from front to back. |
|
| How to Play It: |
| Pro’s Tip: Shorter hitters may opt to use a bailout area to the right of the hazard, others should take aim at the middle of the green. Wind can have an extreme effect on the ball so be aware of its direction. Par is an excellent score on this hole. |
|
|
|
|